DIY Hanging Wall Art
As I promised earlier this week, today I'm sharing a tutorial for making your own hanging wall art. This craft can be as simple or complex as you would like to make it. I decided to hand paint and letter my artwork, but you can always use a print you already own. And while my example is a fall design, you can use this for any season.


My supplies include: art paper (I used Bristol paper from Blick, any thick weight paper will work, or you can use a print), dowel rod(s) or other lightweight wood with a flat edge (I used some scrap wood we had at home), Tombow MONO Aqua Liquid Glue, hemp or jute cord, ruler, and scissors.
Optional supplies: scratch paper, pencil, eraser, binder clips, and your favorite art supplies if you plan to create your artwork, like Tombow's Dual Brush Pens. You may also need a handsaw to cut your dowel rod(s) to size. I recommend leaving an extra two inches beyond the length of your paper/print, one inch on each side.
If you are using a print, you can skip to step four.
Step One: Mark the height of the dowel rod on the top and bottom of your art paper before you create your artwork. This portion of paper will be covered when your rods are glued on.


Step Two: Sketch out your design on scratch paper before you begin drawing/painting. I only sketched the oval shape and the quote I would be putting inside. I did not sketch my wreath, but you can do this if you would like to map it out before you begin.

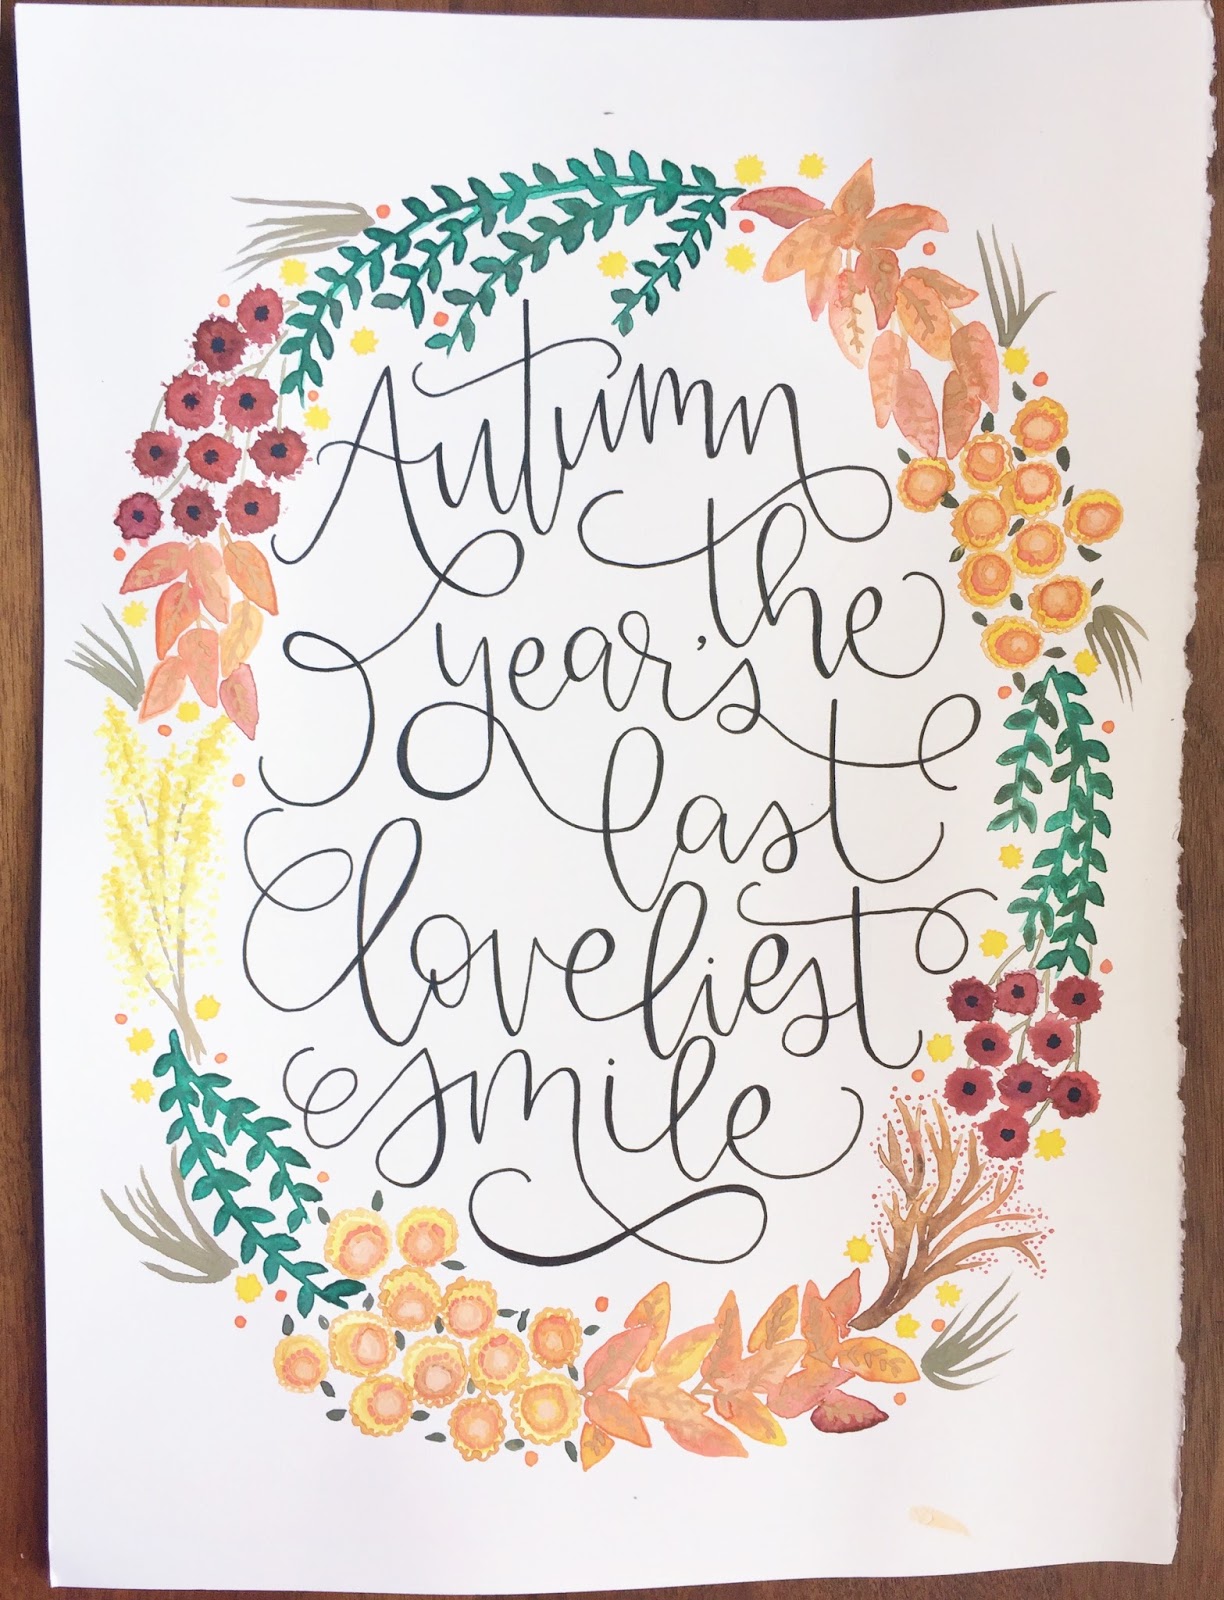
Step Three: Create your artwork. For my design, I lightly drew an oval in pencil on my Bristol paper. Then I used watercolor paint to create the wreath. I let my first layer dry, then went back and painted more details for added depth and dimension. I let the wreath dry completely before sketching the quote inside.


When I was done with my wreath, I lightly sketched the quote inside. I adjusted spacing and size until I was happy with the layout.

Next, I wrote over the sketch with an art pen, then went over the words with an eraser to remove pencil markings. If you're looking for some good pens to use on your artwork, check out Tombow's new MONO Drawing Pens, which come in three tip sizes.

After removing all the pencil markings, I went back over all the letters, thickening lines and adding some additional flourishes.

Step Four: Glue your dowel rods to the paper. Apply a thin line of glue along the top edge of your paper using the pen tip of the Tombow MONO Aqua Liquid Glue.

Lightly position the dowel rod on top of the glue until you are satisfied with the placement. Then press down firmly. I used small binder clips to hold the paper onto the wood. You can also use a weighted object to press down firmly on the dowel rod.


Repeat this step on the bottom end of the paper, then set aside and let dry. I checked my art after about 15 minutes and touched up any areas that hadn't adhered to the wood.

Step Five: Measure and cut your cording. I recommend adding an extra 8-10 inches so you have plenty of cording to use for tying. The overall length of the cording is up to you.

Step Six: Tie the cording onto the top dowel rod on either side of the artwork. Once your glue is dry, remove the clips or weighted object and turn your art face down. Double knot the cording, pulling tightly, and positioning the knot on the back of the dowel rod.

Trim off any extra cording after checking that the overall length is what you want.

Step Seven: Hang up your artwork and enjoy!


If you create your own hanging wall art, I would love to see it! Share it on Instagram and tag @elm_creative, or you can send it to me directly via email.

DIY Hanging Wall Art

Optional supplies: scratch paper, pencil, eraser, binder clips, and your favorite art supplies if you plan to create your artwork, like Tombow's Dual Brush Pens. You may also need a handsaw to cut your dowel rod(s) to size. I recommend leaving an extra two inches beyond the length of your paper/print, one inch on each side.
If you are using a print, you can skip to step four.
Step One: Mark the height of the dowel rod on the top and bottom of your art paper before you create your artwork. This portion of paper will be covered when your rods are glued on.


Step Two: Sketch out your design on scratch paper before you begin drawing/painting. I only sketched the oval shape and the quote I would be putting inside. I did not sketch my wreath, but you can do this if you would like to map it out before you begin.

Step Three: Create your artwork. For my design, I lightly drew an oval in pencil on my Bristol paper. Then I used watercolor paint to create the wreath. I let my first layer dry, then went back and painted more details for added depth and dimension. I let the wreath dry completely before sketching the quote inside.


When I was done with my wreath, I lightly sketched the quote inside. I adjusted spacing and size until I was happy with the layout.

Next, I wrote over the sketch with an art pen, then went over the words with an eraser to remove pencil markings. If you're looking for some good pens to use on your artwork, check out Tombow's new MONO Drawing Pens, which come in three tip sizes.

After removing all the pencil markings, I went back over all the letters, thickening lines and adding some additional flourishes.
Step Four: Glue your dowel rods to the paper. Apply a thin line of glue along the top edge of your paper using the pen tip of the Tombow MONO Aqua Liquid Glue.

Lightly position the dowel rod on top of the glue until you are satisfied with the placement. Then press down firmly. I used small binder clips to hold the paper onto the wood. You can also use a weighted object to press down firmly on the dowel rod.


Repeat this step on the bottom end of the paper, then set aside and let dry. I checked my art after about 15 minutes and touched up any areas that hadn't adhered to the wood.

Step Five: Measure and cut your cording. I recommend adding an extra 8-10 inches so you have plenty of cording to use for tying. The overall length of the cording is up to you.

Step Six: Tie the cording onto the top dowel rod on either side of the artwork. Once your glue is dry, remove the clips or weighted object and turn your art face down. Double knot the cording, pulling tightly, and positioning the knot on the back of the dowel rod.

Trim off any extra cording after checking that the overall length is what you want.

Step Seven: Hang up your artwork and enjoy!


If you create your own hanging wall art, I would love to see it! Share it on Instagram and tag @elm_creative, or you can send it to me directly via email.


How lovely!
ReplyDeleteThank you so much!
Delete